As much as I love the idea of ditching dairy in all possible way, my vegetarian family doesn’t quite love that idea. And unsurprisingly, they love their daily dose of ghee or the quintessential Indian clarified butter. That’s why I make this easy Probiotic Kefir Cultured Ghee to give them the best quality ghee I can. Yes, this is super easy, homemade and full of all that goodness that traditionally made Indian ghee is known for.

Ghee or clarified butter is an age-old dairy derived fat used in Indian cooking. Traditionally, ghee is made from cultured cream through a tedious churning and cooking process. The milk fat is collected after boiling raw milk and stored until a desired amount is collected. Then the cream is allowed to ferment with a spoonful of yogurt(all those good bacteria in Ghee comes from here) and then churned into butter. The butter is then used to make clarified butter or ghee by heating under medium until the milk fat separates and a clear golden liquid floats. That’s the pure, aromatic and cultured ghee my friends.

My easy probiotic kefir cultured ghee also goes through a fermentation process. That’s why it is good for digestion and has a beautiful sweet aroma just as the cultured homemade ghee we find in India. I used both yogurt and kefir to ferment the cream before making butter and ghee out of it.

Is Easy Probiotic Kefir Culture Ghee Good for You?
Whether ghee is good for you or not, that’s still debatable. People on a plant-based diet who ditch any kind of fat for good can never approve ghee in their diet. However, ghee is recently gaining popularity among those following a strict low-carb and keto diet. Ghee is after all a good source of fat. But the store bought ones are not good enough as the actual cultured ghee we find in India. Because most store bought ones are not cultured, they don’t have a good grainy texture, a perfectly sweet aroma and a light yellow tint.

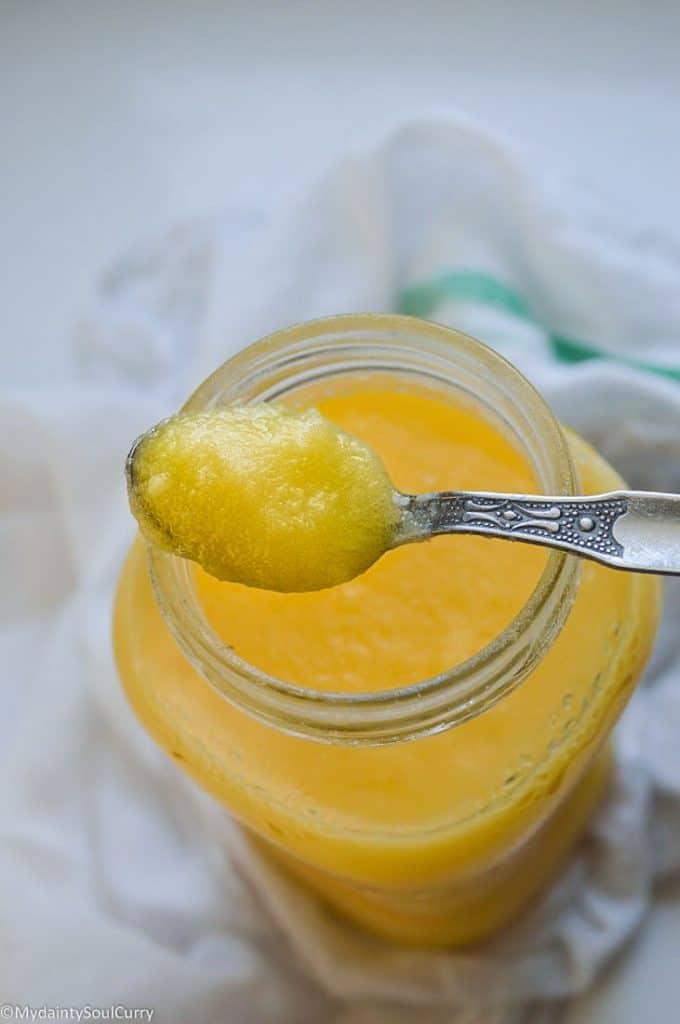
Unlike that, my easy probiotic kefir cultured ghee is fragrant. It’s easy on stomach and aids digestion because of the good bacteria from kefir and yogurt. Whether you love ghee or want to make some for your family(as I do), you will find this recipe of my easy probiotic kefir cultured ghee very helpful.
Few Recommendations:
- For this process, you will need a hand/stand mixer, blender or a processor. Any of these will work absolutely fine to give you some authentic cultured homemade butter or ghee.
- Fermentation is an absolute must if you want the perfect probiotic kefir cultured ghee. If you don’t like the idea to wait till 48 hour before starting to make some ghee, then start with step two for making butter out of cream and proceed to make ghee.
- Ghee stores well in room temperature. You can also refrigerate it to store it for a longer time.
- If you want to make only butter, make sure to rinse and squeeze the butter as much as you can. As a result, you will have a smooth, water-free and creamy cultured butter.
- And lastly, there is nothing like this homemade cultured butter and ghee. Try it for yourself to see how does it taste like.
Recipe of Easy Probiotic Kefir Cultured Ghee:
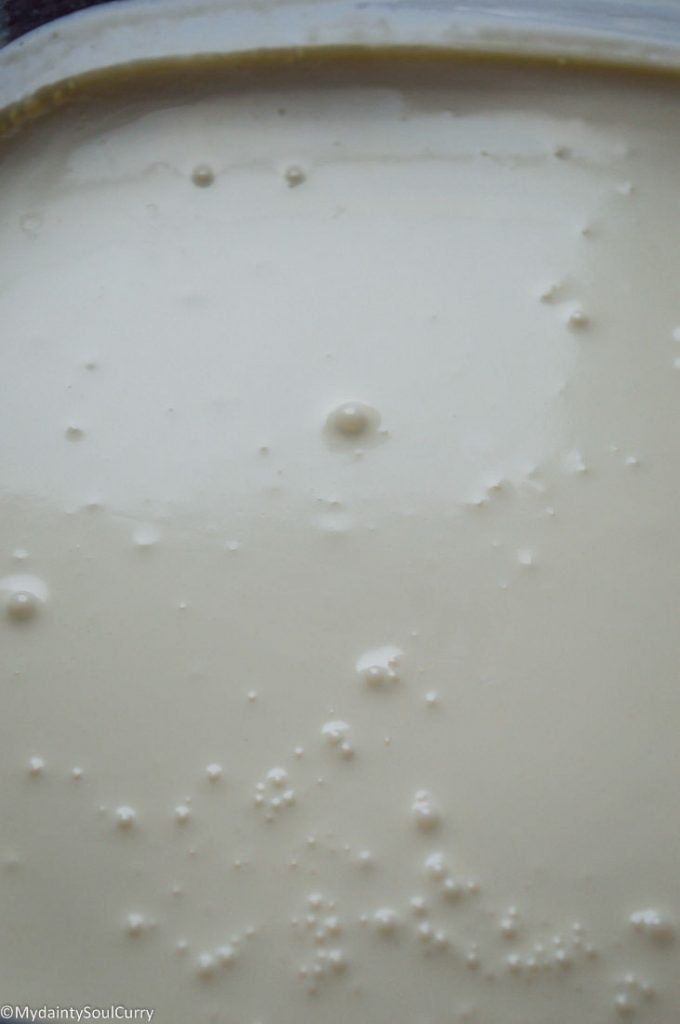
Step-1: Culture Cream
- For making homemade easy probiotic kefir cultured ghee, you will need 1 pint of full-fat cream(preferably pasteurized), ¼ cup plain yogurt and ¼ cup plain kefir. Don’t use the sugary or the flavored kefir or yogurt for this recipe.
- In a big microwave safe bowl, add the cream. Heat the cream for few seconds and mix it thoroughly and heat it again for few seconds until the cream feels warm. (may take 1-3 minutes)
- Now add the kefir and yogurt to the cream and mix thoroughly.
- Cover the bowl and keep it in a warm and dark place. (you can keep it in a preheated oven too if the room temperature is very cold)
- Allow the fermentation for 24-48 hours until the mixture thickens just like yogurt.
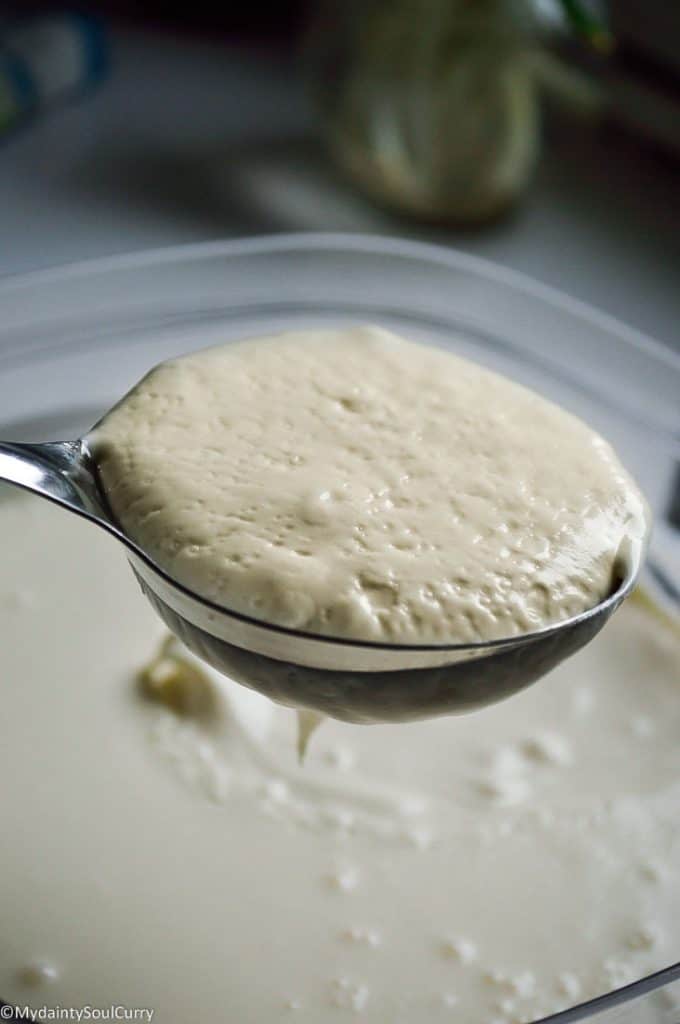
Step-2: Process and Separate Butter:

- You will need 4 cups of ice cold water and a food processor/mixer/blender for this process.
- Add 2-3 cups of cultured cream to the food processor and process until smooth.
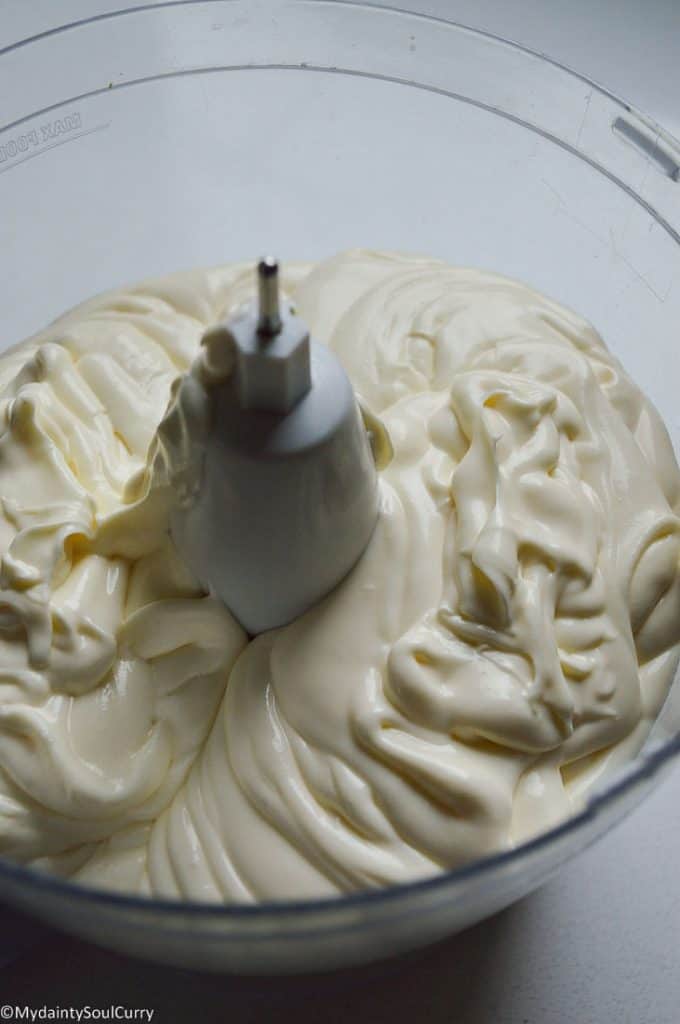
- Once you start seeing the butter separating, add ½ cup to 1 cup of ice-cold water.
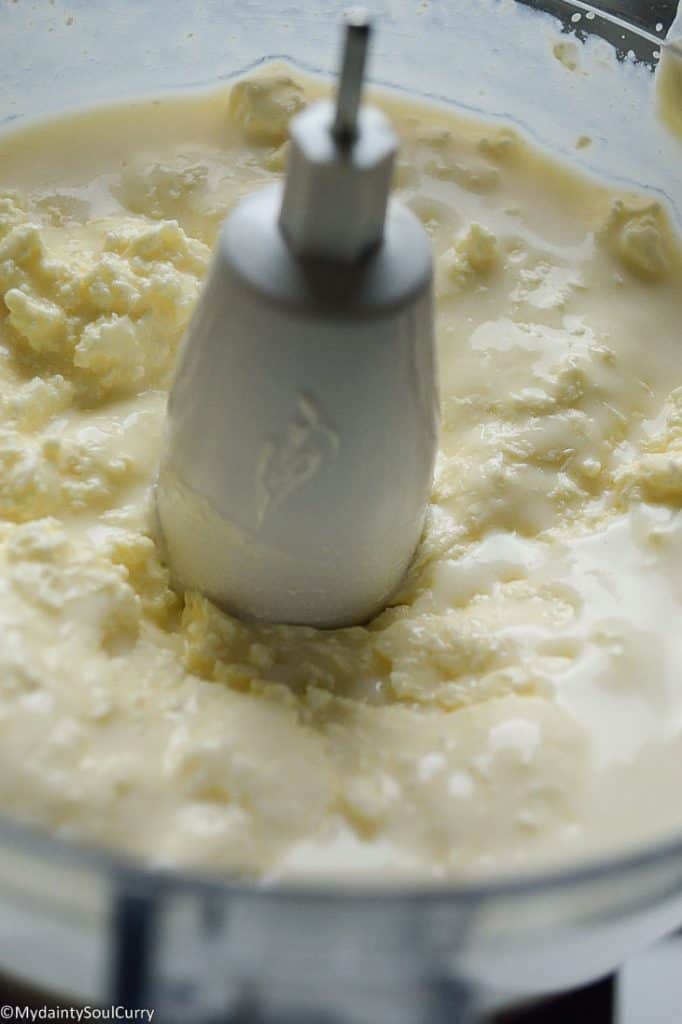
- As you keep processing, the butter will separate and float on the liquid.
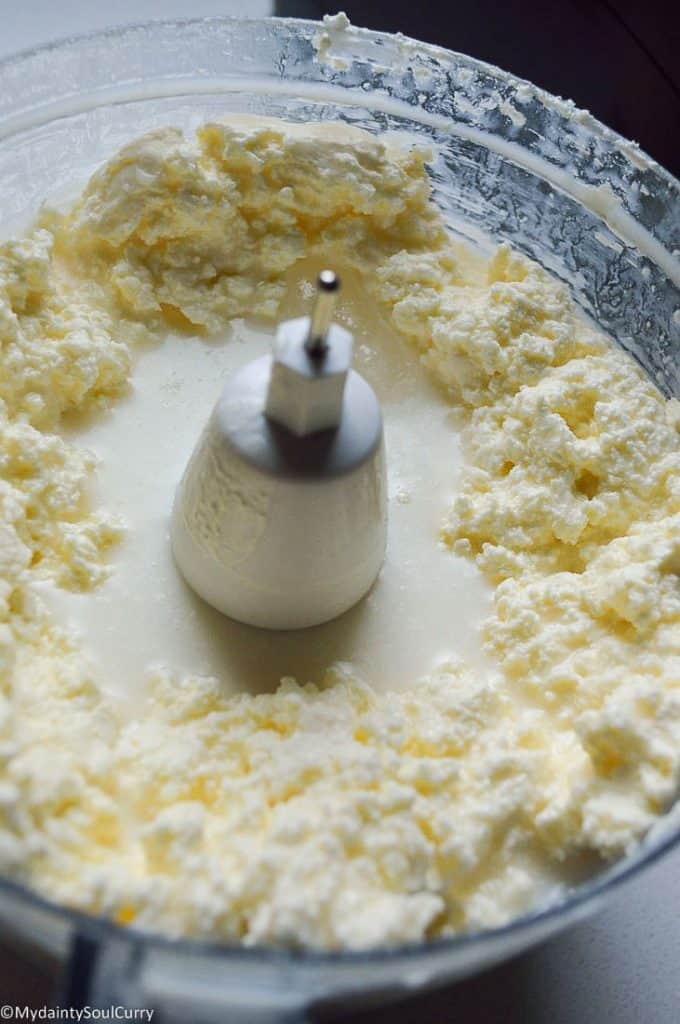
- Use a muslin cloth/cheese cloth/strainer to separate the butter from the liquid.
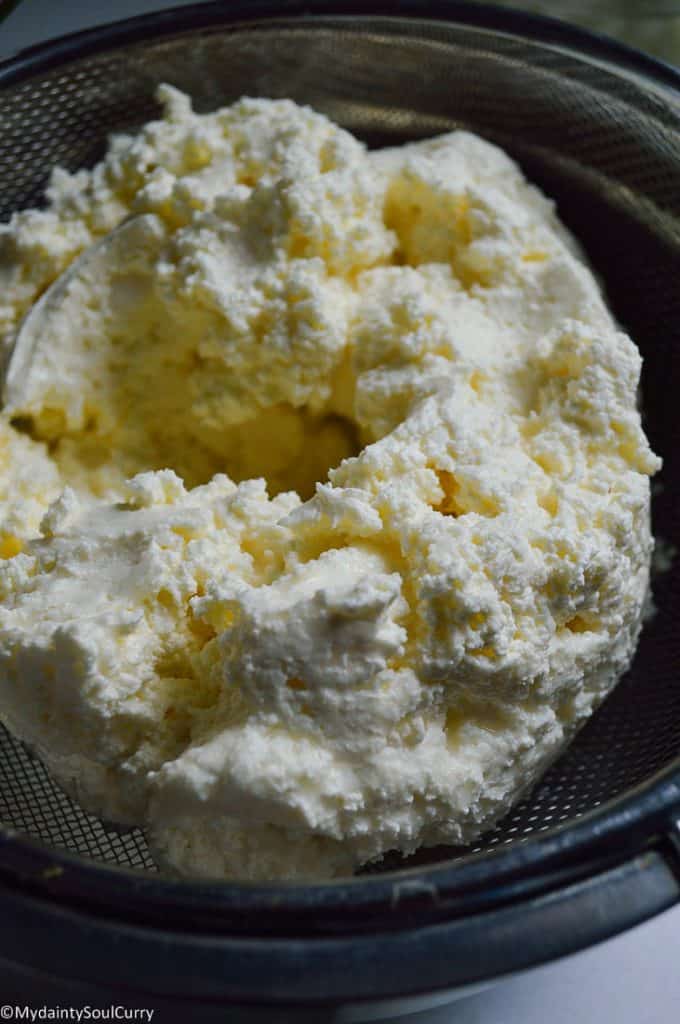
- Do not throw the liquid. This is cultured buttermilk, which you can use in recipes.
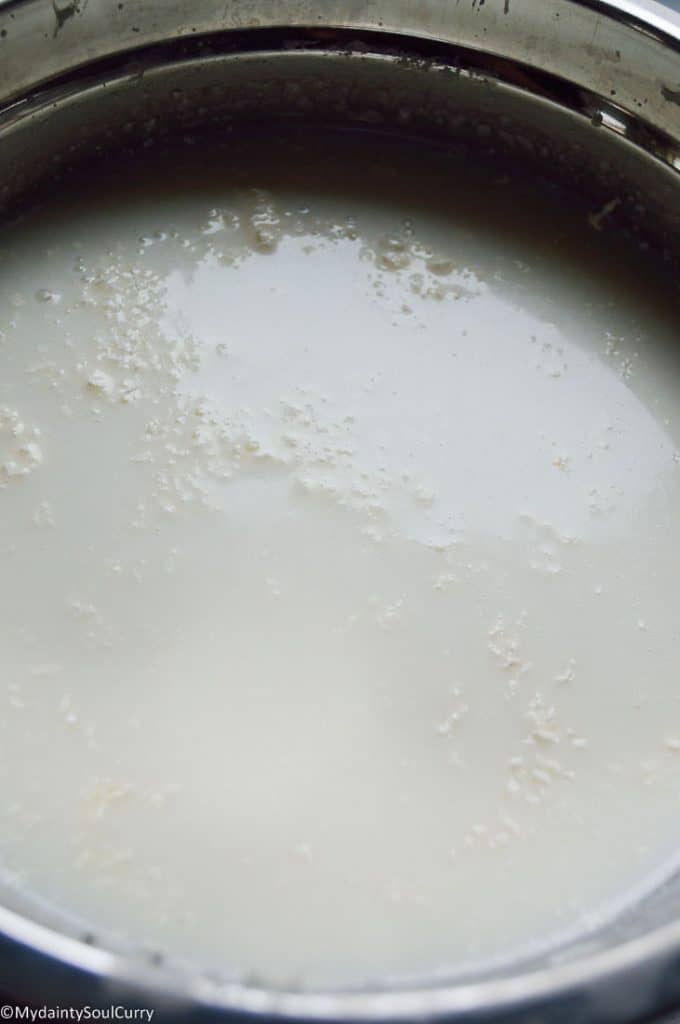
- In a similar way, process rest of the cream and separate butter from the butter milk.
- Collect all the butter in a heavy bottom pan.
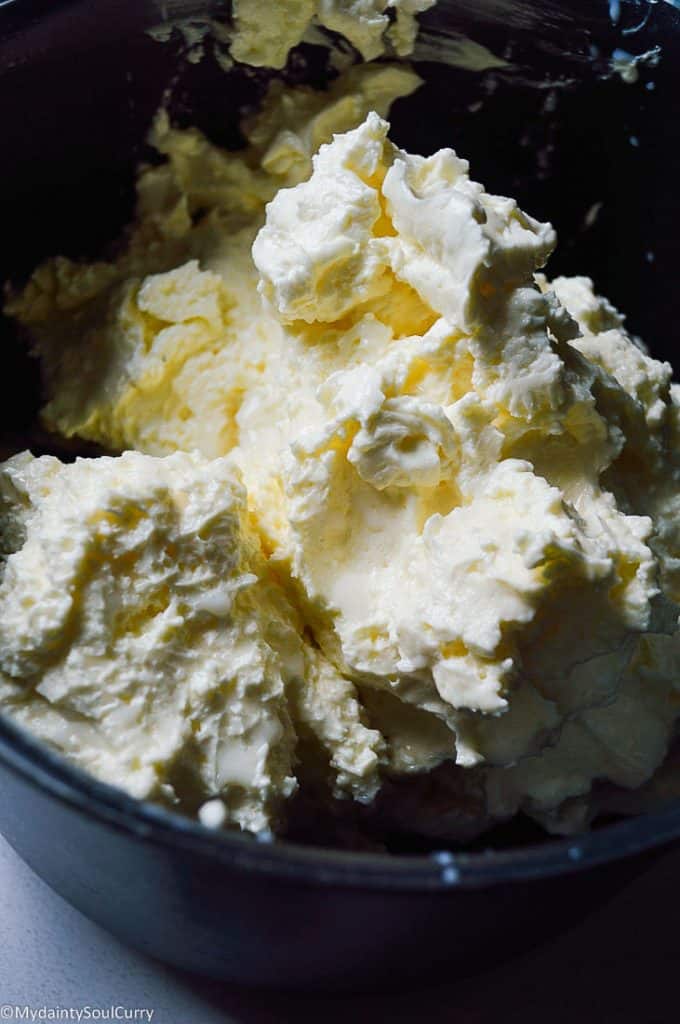
Step-3: Prepare Ghee:
- Before making ghee, squeeze the excess buttermilk from the butter thoroughly.
- If you wish to store some butter, rinse the squeezed butter a few times until the water runs clear.
- Then squeeze it again and roll it on a flat surface to shape it.
- Store it in the refrigerator for a week or two.
- For making ghee, heat the butter at medium temperature.
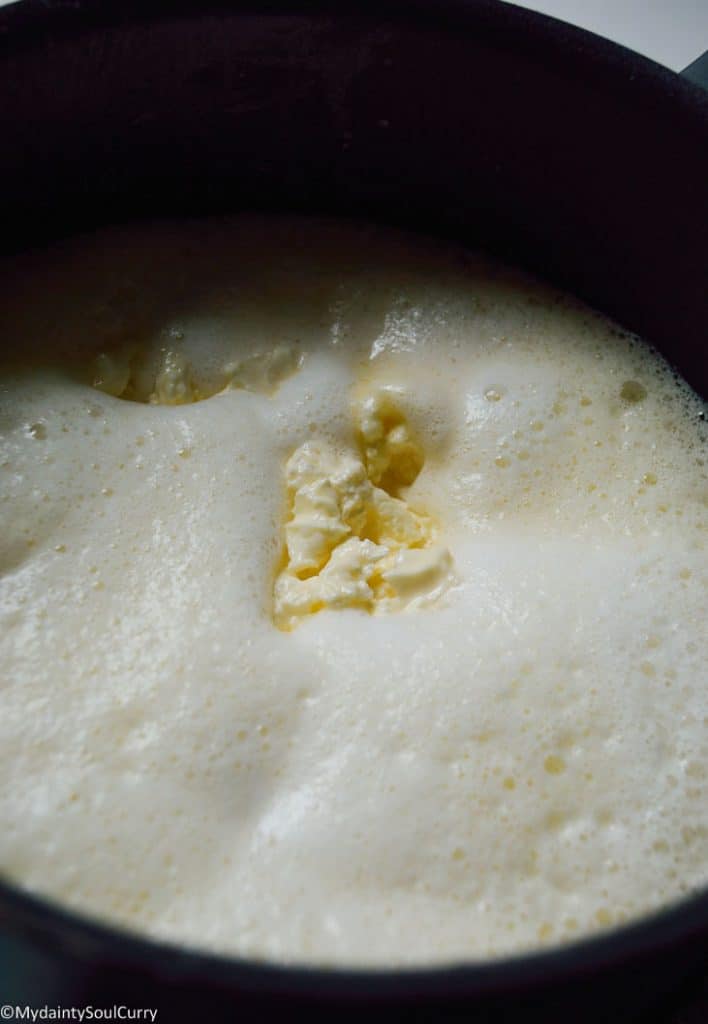
- The butter will melt and become frothy. This is very normal. You don’t have to remove the froth from the liquid. However, separating the froth will make the process a bit quicker.
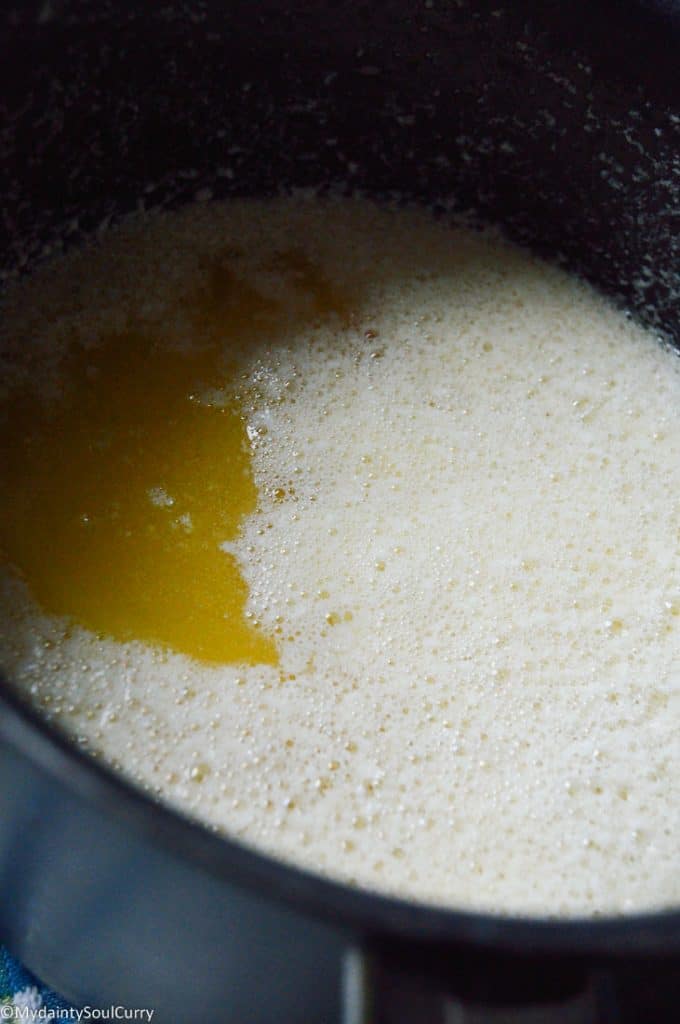
- Allow the butter to cook under low temperature until the liquid turns clear and milk fats settle at the bottom.
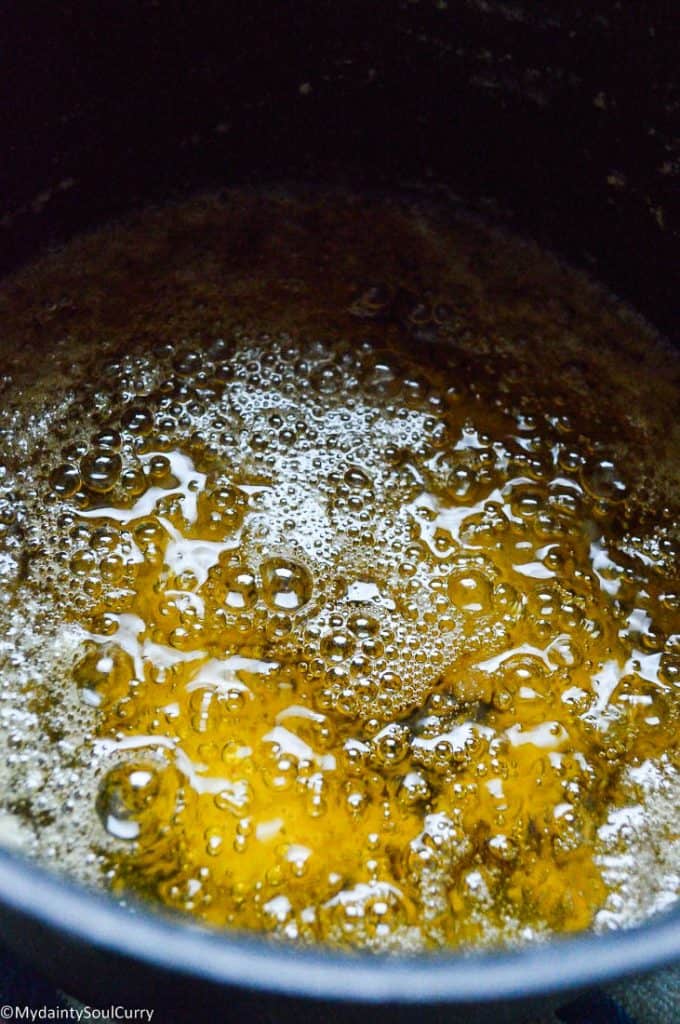
- At this point, you will be able to see a clear orange liquid and a layer of settled milk fat at the bottom of the pan.
- Stop cooking the butter at this point. Turn the heat off and allow the liquid to cool down.
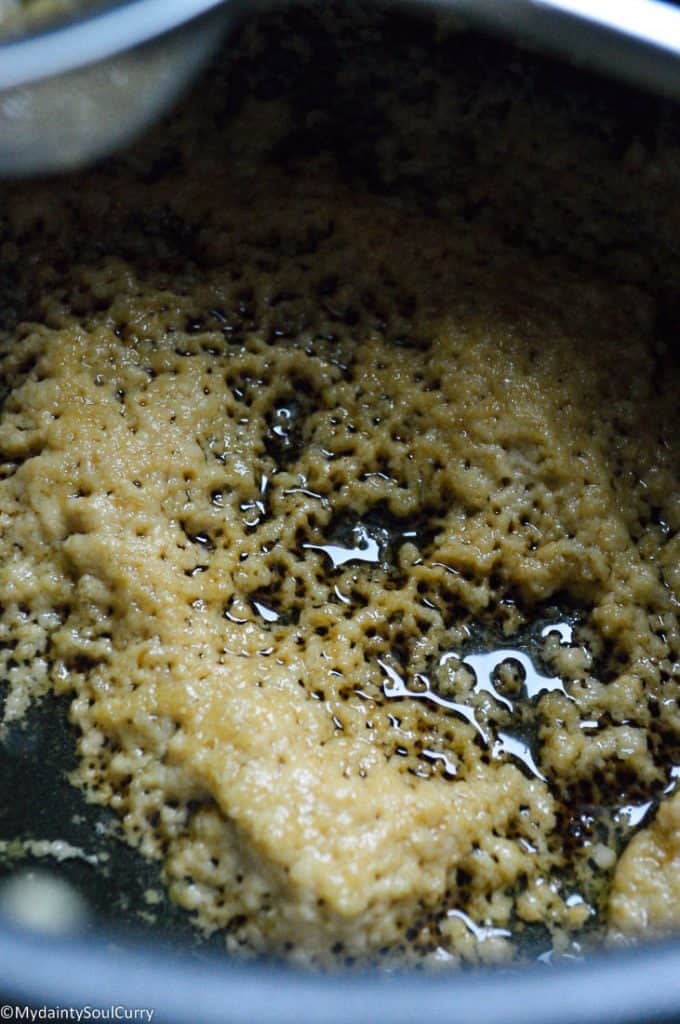
- Strain the liquid and separate the milk fat. You can either discard or use the milk fat in some recipes.
- Your easy probiotic kefir cultured ghee is ready.
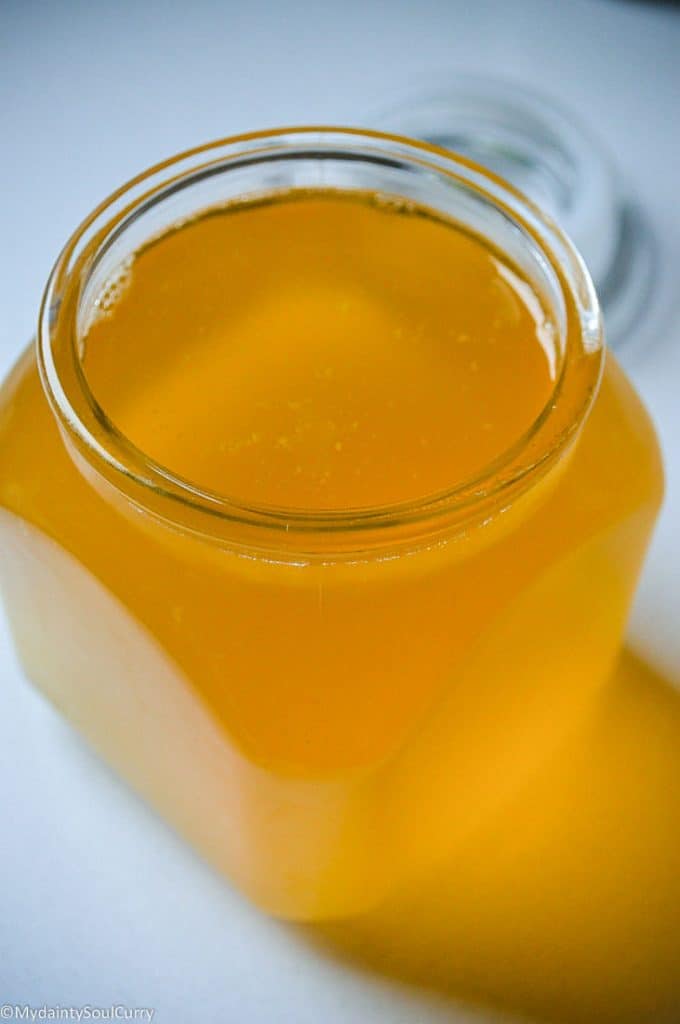
- Store it at room temperature in a cool and dark place or refrigerate it for a better shelf-life.
Nutrition Facts:
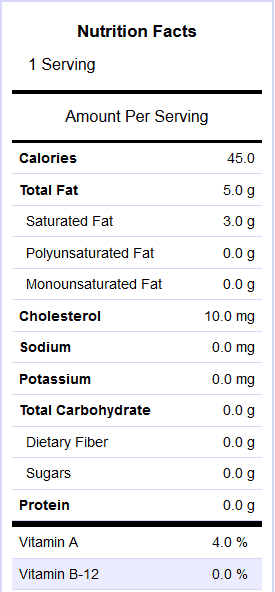
The easy probiotic kefir cultured ghee recipe yields 32 oz of ghee depending on the quality of the cream. Here is a nutritional fact breakdown.
📖 Recipe
Easy Probiotic Kefir Cultured Ghee
Equipment
- Instant pot
Ingredients
- 1 pint heavy cream
- ¼ cup plain yogurt
- ¼ cup plain kefir
Instructions
Step-1: Culture Cream
- For making homemade easy probiotic kefir cultured ghee, you will need 1 pint of full-fat cream(preferably pasteurized), ¼ cup plain yogurt and ¼ cup plain kefir. Don’t use the sugary flavored kefir or yogurt for this recipe.
- In a big microwave safe bowl, add the cream. Heat the cream for few seconds and mix it thoroughly and heat it again for few seconds until the cream feels warm. (may take 1-3 minutes)
- Now add the kefir and yogurt to the cream and mix thoroughly.
- Cover the bowl and keep it in a warm and dark place. (you can keep it in a preheated oven too if the temperature is very cold)
- Allow the fermentation for 24-48 hours until the mixture thickens.
Step-2: Process and Separate Butter:
- You will need 4 cups of ice cold water and a food processor/mixer/blender for this process.
- Add 2-3 cups of cultured cream to the food processor and process until smooth.
- Once you start seeing the butter separating, add ½ cup to 1 cup of ice-cold water.
- As you keep processing, the butter will separate and float on the liquid.
- Use a muslin cloth/cheese cloth/strainer to separate the butter from the liquid.
- Do not throw the liquid. This is cultured buttermilk, which you can use in recipes.
- In a similar way, process rest of the cream and separate butter from the buttermilk.
- Collect all the butter in a heavy bottom pan.
Step-3: Prepare Ghee:
- Before making ghee, squeeze the excess buttermilk from the butter thoroughly.
- If you wish to store some butter, rinse the squeezed butter a few times until the water runs clear.
- Then squeeze it again and roll it on a flat surface to shape it.
- Store it in the refrigerator for a week or two.
- For making ghee, heat the butter under medium temperature.
- The butter will melt and become frothy. This is very normal. You don’t have to remove the froth from the liquid. However, separating the froth will make the process a bit quicker.
- Allow the butter to cook under low temperature until the liquid turns clear and milk fats settle at the bottom.
- At this point, you will be able to see a clear orange liquid and settled milk fat at the bottom of the pan.
- Stop cooking the butter at this point. Turn the heat off and allow the liquid to cool down.
- Strain the liquid and separate the milk fat. You can either discard or use the milk fat in some recipes.
- Your easy probiotic kefir cultured ghee is ready.
- Store it in room temperature in a cool and dark place or refrigerate it for a better shelf-life.
Instant Pot Method(Culture)
- Pour the heavy cream(preferably at room temperature) to the inner pot of the instant pot. Add yogurt and kefir, and set the instant pot to the yogurt mode. The pot automatically selects 8 hours on the timer in the yogurt setting. After 8 hours, open the lid and you will see thick, yogurt like cultured cream inside your instant pot.
Churn and make butter:
- Use a food processor and churn butter out of your cultured cream. Use iced water in regular intervals to separate butter from the cream.After you collect enough butter, squeeze the excess liquid or buttermilk out of the butter and transfer the butter to a big bowl.
Make ghee in instant pot
- Set the instant pot into sauté mode and let it display “hot.” Add the squeezed butter and allow it to melt at the lowest temperature setting.
- Once The butter melts, use a silicone or stainless steel spatula to stir this butter. It is important to stir in every minute or two to avoid burning.
- Don’t forget to scrape the bottom of the pot occasionally too. Once the butter starts to boil vigorously, switch the mode to “keep warm” for 2-3 minutes. This process maintains the temperature while the butter still cooks and the milk solids start to separate from the ghee.
- At this point, you will notice foam building up on the top of the hot liquid. Once the butter stops boiling, set the instant pot to sauté mode again and this time, cook the melted butter till it becomes clear. (It takes exactly 6 to 10 minutes)
- The goal is to get a light, golden liquid separated from the milk solids. Make sure to check the butter in regular intervals to see if it’s not overcooked. If the milk solids burn, the ghee will turn black in color. The ghee will then have a very unpleasant, charred flavor. Switch off the instant pot once you see clear liquid and settled milk solids at the bottom of the instant pot.
- Wait for 8-10 minutes till the ghee cool down a bit. (The ghee continues to cook for few more minutes even after you switch off the IP)After the ghee cools down, strain the ghee using a fine mesh strainer and collect the liquid gold inside a glass jar. You can discard the milk solids or use it in a recipe if you want.
- You will always have to keep a watch on the color of the surface - the "foam" (which are the proteins). The goal is to get that to a light golden color, NOT BROWN. If you see brown, you've probably burned the milk solids and charred the taste of the ghee.
Notes
- For this process, you will need a hand/stand mixer, blender or a processor. Any of these will work absolutely fine to give you some cultured homemade butter or ghee.
- Fermentation is an absolute must if you want the perfect easy probiotic kefir cultured ghee. If you don’t like the idea to wait till 48 hour before starting to make some ghee, then start with step two for making butter out of cream and proceed to make ghee.
- Ghee stores well in room temperature. You can also refrigerate it to store it for a longer time.
- If you want to make only butter, make sure to rinse and squeeze as much as you can. As a result, you will have a smooth, water-free and creamy cultured butter.
- And lastly, there is nothing like a homemade cultured butter and ghee. Try it for yourself to see what does it taste like.
Nutrition
Some vegan nut butter recipes from the blog are here! Just click on the images to visit the recipe page.







Meghna
This is one amazing recipe oh my and what gorgeous shots, wanna dig in to your home made butter ... sluurrrpppp
Sophie
The process is so worth it, I must say you should give this old-school method a try.
Lathiya
Ghee is one inevitable thing we use in our home...this ghee looks amazing and you made this perfect
Sophie
Thank you Lathiya. My family is ghee lover, and am not. Love to make for them.
Ruk
Hello there, I want to make this recipe with premade cultured butter, how much will I need for this recipe? Thank you
Sophie
You can take four cups of pre cultured butter for this.
usama
ur recepie is great bt i have a question .my mom already make cultred ghee from yogurt .can i add kefir probiotic directly in ghee to make probiotic kefir ghee??or i must add kefir in the start like u said?or just add kefir water in ghee bcz ghee is already form.ghee is present so i put kefir in ghee to make kefir ghe?is this work ?
Andrea Avery
Hi, thanks for your recipe! I have a few questions. One, what is the point of culturing the cream if the probiotics are going to be killed when the ghee is heated? Does it give the ghee a better flavor? Next, can I culture the cream using just kefir or just yogurt? Last, how can I make my ghee smooth and nutty like Ancient Organic rather than grainy? Thanks so much!
Sophie
You may either choose kefir or a mixture of both to culture the cream. Yes, this process gives the ghee a different flavor and aroma.
Sophie
Yes, it does give the ghee a better flavor. I am not sure about the temperature though. But the instant pot warm and sauté at low temperature keeps the ghee at 105f, which is not enough to kill the microbes. But there is a possibility of killing them when the cream is heated at high temperature above 130F.
Ina
Thank you for the lovely recipe!
I always culture crème with my Kefir grains and we eat it like that. It’s delicious! I will try making butter with it and the Ghee. I suggest you try culturing the cream just with the grains in the place of milk. They even grow faster that way.
Mariyah
Any bacteria that is present in cultured butter is actually killed during cooking process. Cultured vs Uncultured ghee is purely a case of preferring one smell over another. Nutritionally there is zero difference. Thought i will educate yourself even when you will surely not post this comment, but you will at least read it and that’s enough.